Are you looking to elevate your DIY game? Have you heard of sublimation printing but don’t know where to start? Look no further! In this step-by-step guide, we will show you how to use Cricut Design Space to create and print your own sublimation designs for a variety of projects.
Get ready to unleash your creativity with sublimation printing. With this powerful technique, you can create vibrant, long-lasting designs on a range of surfaces, from mugs to t-shirts to phone cases. The possibilities are endless! But first, you need to know how to use Cricut Design Space to create your designs and prepare them for sublimation printing.
In this guide, we will walk you through the entire process, from setting up your design in Cricut Design Space to printing it on sublimation paper to transferring the design onto your chosen object. You don’t need any prior experience with sublimation printing or Cricut Design Space – we’ll cover everything you need to know in a clear, easy-to-follow way.
So what are you waiting for? Whether you’re a seasoned DIY enthusiast or just starting out, this guide will help you take your projects to the next level. Get ready to impress your friends and family with your newfound sublimation printing skills. Follow our step-by-step guide and unlock endless possibilities!
“How To Print Sublimation From Cricut Design Space” ~ bbaz
Comparison between Sublimation and Other Printing Methods
Sublimation printing is becoming more popular in the printing industry. But how does it compare to other printing methods?
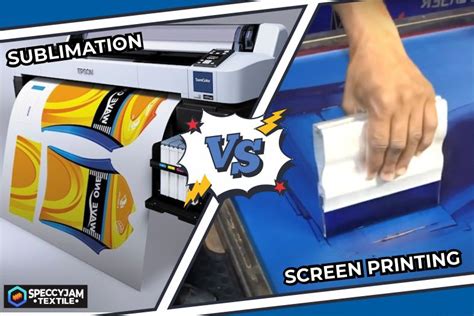
Dye Sublimation vs Vinyl Printing
Vinyl printing has been around for a long time and is commonly used for t-shirts, banners, and signage. So how does dye sublimation compare?
Dye sublimation offers a higher quality print with vibrant colors that will not fade or crack over time. It also allows for printing on a wider variety of fabrics.
Vinyl printing, on the other hand, is more cost-effective and can be done on a wider range of materials including glass and metal.
Dye Sublimation vs Screen Printing
Screen printing is another popular method used for t-shirts and other apparel. But how does it stack up against dye sublimation?
Dye sublimation again offers a higher quality print with no fading or cracking. It also allows for full-color printing without the need for multiple screens.
Screen printing, however, is generally more cost-effective for larger orders and offers a wider range of ink options including metallics and glow-in-the-dark.
What is Sublimation Printing?
Now that we’ve compared sublimation to other printing methods, let’s take a closer look at what sublimation printing actually is.

The Process
Sublimation printing involves using special dye inks that are heat transferred onto polyester or polymer-coated materials.
First, the design is printed onto transfer paper using the dye ink. The transfer paper is then placed onto the material and heat is applied, allowing the ink to convert into gas and bond with the fibers of the material.
The Benefits
There are many benefits to sublimation printing:
- High-quality, durable prints that do not fade or crack over time
- Ability to print full-color designs without the need for multiple screens
- Printing versatility on a wide range of materials including textiles, metals, and plastics
- Environmentally friendly with no waste materials produced during the printing process
Guide to Printing Sublimation with Cricut Design Space
Now that you know more about sublimation printing and its benefits, here is a step-by-step guide to printing sublimation with Cricut Design Space.
Step 1: Design Your Image
The first step is to design your image using Cricut Design Space. Make sure to flip the image horizontally before printing onto the transfer paper.

Step 2: Select Your Sublimation Printer and Transfer Paper
Choose a sublimation printer and transfer paper that are compatible with Cricut Design Space. Some popular options include the Epson EcoTank and Sawgrass Virtuoso printers and TexPrint R sublimation transfer paper.
Step 3: Print and Transfer
Print your design onto the transfer paper using the sublimation printer. Place the transfer paper onto the material and apply heat using a heat press or iron. The heat will turn the ink into gas and bond it to the material.
Step 4: Finish and Enjoy
Once the ink has bonded to the material, remove the transfer paper and enjoy your high-quality, vibrant sublimation print!
Conclusion
Sublimation printing offers many benefits over other printing methods including high-quality, durable prints that do not fade or crack over time. With this step-by-step guide to printing sublimation with Cricut Design Space, you can create your own vibrant and long-lasting designs on a variety of materials.
Thank you for taking the time to read our Step-by-Step Guide on Printing Sublimation with Cricut Design Space. We hope that this guide has provided you with valuable insights into the sublimation printing process and how to integrate it into your Cricut Design Space projects.
As we have detailed throughout this article, sublimation printing can be a wonderful addition to your crafting projects, offering high-quality, long-lasting, and vibrant results. However, it does require some practice and patience, particularly in terms of adjusting your designs and printing settings to create the perfect image.
We encourage you to take what you have learned from this guide and start experimenting with sublimation printing yourself. Whether you are a seasoned crafting veteran or a beginner just starting out, there is always something new to learn about this exciting and rewarding technique.
Thank you again for reading our guide, and we wish you all the best in your sublimation and Cricut Design Space endeavors!
People also ask about Step-by-Step Guide: Printing Sublimation with Cricut Design Space:
- What is sublimation printing?
- What materials can I use for sublimation printing with Cricut Design Space?
- How do I set up my design in Cricut Design Space for sublimation printing?
- What equipment do I need for sublimation printing with Cricut Design Space?
- What temperature and time do I need to use for sublimation printing with Cricut Design Space?
- How do I transfer my sublimation print onto my chosen substrate?
Sublimation printing is a process where ink is transferred onto a substrate using heat. The ink turns into a gas and fuses with the fibers of the substrate, resulting in a permanent, full-color print that won’t crack or peel.
You can use a variety of materials for sublimation printing with Cricut Design Space, including polyester fabrics, ceramic mugs, metal plates, and more. Make sure the material is compatible with sublimation ink and can withstand the heat required for the process.
To set up your design in Cricut Design Space for sublimation printing, create your design as you normally would and make sure it’s sized correctly for your substrate. Then, mirror your design horizontally, as it will be printed in reverse onto the substrate. Finally, print your design onto sublimation paper using a sublimation printer.
To create sublimation prints with Cricut Design Space, you’ll need a few key pieces of equipment, including a sublimation printer, sublimation ink, sublimation paper, a heat press, and your chosen substrate. You may also need additional tools like heat-resistant tape, a teflon sheet, and a lint roller.
The temperature and time required for sublimation printing with Cricut Design Space will depend on your specific equipment and substrate. Generally, you’ll want to use a heat press set to around 400 degrees Fahrenheit for 60-90 seconds. Follow the instructions provided by your equipment manufacturer for best results.
To transfer your sublimation print onto your chosen substrate, place your printed sublimation paper face-down onto the substrate and secure it in place with heat-resistant tape. Place the substrate and paper into the heated press and apply pressure according to the manufacturer’s instructions. After the time is up, remove the substrate from the press and peel off the sublimation paper to reveal your permanent, full-color design.